


The Essential Guide to DNS Settings in Shopify
When managing your Shopify store, a vital aspect is understanding and configuring your DNS settings effectively. These settings are crucial to ensure that your customers can find your online store seamlessly.
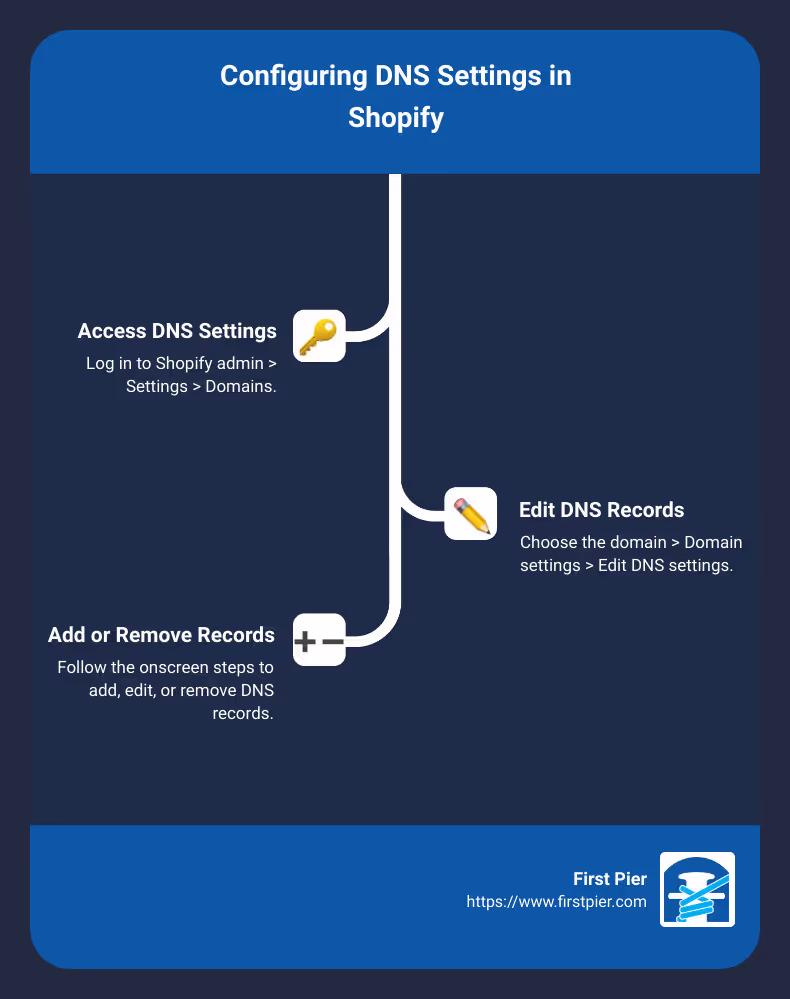
For those looking for a quick answer:
- Access DNS Settings: Log in to Shopify admin > Settings > Domains.
- Edit DNS Records: Choose the domain > Domain settings > Edit DNS settings.
- Add or Remove Records: Follow the onscreen steps to add, edit, or remove DNS records.
Correctly setting up your DNS settings in Shopify ensures your domain points to your store, providing a seamless experience for your customers.
I’m Steve Pogson, a certified Shopify Expert with over 20 years of experience. At First Pier, my team and I specialize in optimizing DNS settings for growing e-commerce businesses to ensure high performance and reliability. Let’s dive deeper into the essentials of configuring your Shopify DNS settings efficiently.
Understanding DNS Settings in Shopify
Before we dive into the steps to modify your DNS settings in Shopify, let's understand the basics of DNS and why it's crucial for your online store.
DNS Basics
DNS stands for Domain Name System. Think of it as the phonebook of the internet. When you type a website address like www.shopify.com into your browser, DNS translates that domain name into an IP address that computers use to identify each other on the network. This process ensures that you reach the correct website.
Domain Name System
The Domain Name System is a hierarchical and decentralized naming system for computers, services, or other resources connected to the internet. It links various information with domain names assigned to each participating entity. Most importantly, it translates more readily memorized domain names to the numerical IP addresses needed for locating and identifying computer services and devices.
Here’s a simple analogy: Imagine DNS as a gigantic address book. When you want to visit a friend, you look up their name in your address book to find their address. Similarly, when you enter a domain name into your browser, DNS looks up the corresponding IP address so you can visit the website.
IP Address
An IP address is a unique string of numbers separated by periods or colons that identifies each computer using the Internet Protocol to communicate over a network. It's like the street address for your computer. There are two types of IP addresses:
- IPv4: This is the most common type, consisting of four sets of numbers separated by periods (e.g.,
23.227.38.65). - IPv6: This is a newer version designed to deal with the exhaustion of IPv4 addresses. It consists of eight groups of four hexadecimal digits separated by colons (e.g.,
2620:0127:f00f:5::).
When you set up your DNS settings in Shopify, you'll often need to configure these IP addresses to ensure your domain points correctly to your Shopify store.
Here’s a quick look at how these components fit together in the context of Shopify:
- A Record: Points your domain to a specific IP address (e.g.,
23.227.38.65for Shopify). - CNAME Record: Points a subdomain to another domain name (e.g.,
wwwtoshops.myshopify.com).
Understanding these basics will help you navigate and configure your Shopify DNS settings more effectively.

In the next section, we'll explore how to access and modify these settings in your Shopify admin panel.
How to Access and Modify DNS Settings on Shopify
Accessing DNS Settings
To manage your dns settings Shopify, you first need to know where to find them. Here’s a step-by-step guide:
- Log in to your Shopify admin: This is your control center for all things Shopify.
- Navigate to Settings: Look for the Settings option at the bottom left of your admin panel.
- Select Domains: Click on Domains to see a list of all the domains associated with your store.

Modifying DNS Records
Once you're on the Domains page, you can start modifying your DNS records. Here’s how to do it:
- Select the Domain: Click on the domain you want to configure.
- Edit DNS Settings: You'll see an option labeled Domain settings. Click on it, then select Edit DNS settings.
You can now add or edit various DNS records:
- A Record: This points your domain to a specific IP address. For Shopify, the default is usually
23.227.38.65. - CNAME Record: This points a subdomain to another domain name. For example,
wwwmight point toshops.myshopify.com. - MX Record: This directs email to your domain’s mail servers.
- TXT Record: These are used for various domain verifications, like Google Search Console.
- AAAA Record: Similar to the A Record but for IPv6 addresses.
- SRV Record: Used to define the location of servers for specific services.
Adding a New DNS Record
- Click Add Custom Record: Choose the type of record you want to add (A, CNAME, MX, etc.).
- Enter Details: Fill in the required fields and click Confirm.
Editing an Existing DNS Record
- Find the Record: Look for the record you want to edit in the list.
- Click Actions > Edit: Make your changes and then click Confirm.

Modifying your DNS records can take up to 24 hours to take effect, so be patient.
In the next section, we’ll cover how to reset your DNS records to their default settings.
Adding and Editing DNS Records in Shopify
Adding a New DNS Record
If you need to add a DNS record for your Shopify-managed domain, follow these steps:
- Access DNS Settings: From your Shopify admin, go to Settings > Domains.
- Select Domain: Click on the domain you want to configure.
- Edit DNS Settings: Click Domain settings > Edit DNS settings.
- Add Custom Record: Click Add custom record, and then choose the type of record you want to add (A, CNAME, MX, etc.).
- Enter Details: Fill in the required fields and click Confirm.
Adding a new DNS record is straightforward. For example, if you want to set up a third-party email service, you might need to add an MX record. Simply select the MX record type, enter the details provided by your email service, and confirm the changes.
Editing an Existing DNS Record
Editing an existing DNS record is just as simple:
- Find the Record: From your Shopify admin, go to Settings > Domains and click on the domain you want to configure.
- Edit DNS Settings: Click Domain settings > Edit DNS settings.
- Locate the Record: Look for the record you want to edit in the list.
- Click Actions > Edit: Click Actions next to the record and then select Edit.
- Modify Details: Make the necessary changes and click Confirm.
For instance, if you need to verify your domain with Google Search Console, you might need to edit a TXT record. Locate the existing TXT record, edit it with the verification code provided by Google, and confirm the changes.
Remember, changes to your DNS records can take up to 24 hours to take effect. So, patience is key.
In the next section, we’ll cover how to reset your DNS records to their default settings.
dns settings shopify: Resetting DNS Records to Default
Sometimes, you might need to reset your DNS records to their default settings. This could be to fix an error or to start fresh. Shopify makes this process simple.
Resetting a Single DNS Record
You can reset individual DNS records like the A Record, AAAA Record, and CNAME Record to their default settings. Here’s how:
- Go to Settings: From your Shopify admin, navigate to Settings > Domains.
- Select Your Domain: Click on the domain you want to configure.
- Edit DNS Settings: Click on Domain settings > Edit DNS settings.
- Reset the Record: Find the record you want to reset. Click Actions > Reset.
- Confirm: Click Confirm to reset the record.
This will point the record back to Shopify. For instance, resetting the A Record will set it to the default Shopify IP address.
Resetting All DNS Settings
If you need to reset all your DNS settings, follow these steps:
- Go to Settings: From your Shopify admin, navigate to Settings > Domains.
- Select Your Domain: Click on the domain you want to configure.
- Edit DNS Settings: Click on Domain settings > Edit DNS settings.
- Advanced Settings: Scroll down to the Advanced settings section.
- Reset DNS Settings: Click Reset DNS settings.
- Confirm: Click Confirm to reset all settings.
This action will delete all non-default records. The A Record, AAAA Record, and CNAME Record will be reset to point to Shopify.
Important: Resetting all DNS settings will remove any custom configurations. Ensure you have a backup if needed.
In the next section, we’ll troubleshoot common DNS issues you might encounter with Shopify.
Troubleshooting Common DNS Issues with Shopify
When managing DNS settings on Shopify, you might encounter issues that need attention. Here's how to troubleshoot common problems:
A Record Isn't Pointing to Shopify
Notification: Your domain's A record doesn’t point to Shopify.
Solution: Ensure your A record points to Shopify's IP address: 23.227.38.65.
- Log in to your domain provider.
- Navigate to DNS settings.
- Update the A record to 23.227.38.65.
- Remove any other A records.
Why it matters: The A record directs your domain to Shopify. Incorrect settings can cause connectivity issues.
CNAME Record Issues
CNAME Record Isn't Pointing to Shopify
Notification: Your domain's CNAME record doesn't point to Shopify.
Solution: Set your CNAME record to shops.myshopify.com.
- Log in to your domain provider.
- Navigate to DNS settings.
- Update the CNAME record to shops.myshopify.com.
- Save changes.
CNAME Record Is Missing
Notification: Your domain has no CNAME record.
Solution: Add a CNAME record pointing to shops.myshopify.com.
Why it matters: CNAME records manage subdomains. Incorrect settings can disrupt routing to Shopify.
Handling Multiple DNS Records
Multiple A Records
Notification: Your domain has too many A records.
Solution: Ensure there's only one A record pointing to 23.227.38.65.
- Log in to your domain provider.
- Navigate to DNS settings.
- Delete any extra A records.
Multiple AAAA Records
Notification: Your domain has too many AAAA records.
Solution: Ensure there's only one AAAA record pointing to 2620:0127:f00f:5::.
- Log in to your domain provider.
- Navigate to DNS settings.
- Delete any extra AAAA records.
Why it matters: Multiple records can cause random routing, leading to inconsistent site access.
Other Common Issues
Needs Attention Badge
Notification: Your domain needs attention.
Solution: Follow the specific instructions provided by the notification.
Certificate Authorities
Notification: Your domain doesn't permit Let's Encrypt and GlobalSign.
Solution: Add CAA records for letsencrypt.org and globalsign.com.
- Log in to your domain provider.
- Navigate to DNS settings.
- Add CAA records for letsencrypt.org and globalsign.com.
Why it matters: Proper CAA settings allow Shopify to issue SSL certificates, securing your site.
By addressing these common DNS issues, you ensure your Shopify store runs smoothly and securely.
In the next section, we'll answer frequently asked questions about DNS settings on Shopify.
Frequently Asked Questions about DNS Settings Shopify
How do I open DNS settings on Shopify?
To access your DNS settings on Shopify, follow these simple steps:
- Log in to your Shopify admin.
- Navigate to Settings.
- Click on Domains.
- Select the domain you want to configure.
- Click on Domain settings and then Edit DNS settings.
You can now view and edit your DNS records from this page.
How do I verify DNS record on Shopify?
Verifying a DNS record on Shopify is straightforward. Here's how:
- Log in to your Shopify admin.
- Go to Settings > Domains.
- Select the domain you need to verify.
- Click on Domain settings > Edit DNS settings.
- Locate the specific DNS record you need to verify and check its details.
If the record matches the required settings, your domain should be verified successfully.
What is Shopify DNS record?
A Shopify DNS record is an entry in the DNS (Domain Name System) that directs traffic to your Shopify store. Common DNS records you might encounter include:
- A Record: Points your domain to an IP address.
- CNAME Record: Points a subdomain to another domain name.
- MX Record: Directs email to your email server.
- TXT Record: Provides text information to sources outside your domain.
- AAAA Record: Points your domain to an IPv6 address.
- SRV Record: Specifies services available for your domain.
These records are essential for managing how your domain interacts with Shopify and other services.
In the next section, we'll explore how to reset DNS records to their default settings on Shopify.
Conclusion
Setting up and managing your DNS settings on Shopify can seem daunting, but it's crucial for ensuring your online store runs smoothly. Correct DNS settings ensure that your domain points to your Shopify store, allowing customers to find you without any hiccups.
Recap
We've covered the basics of DNS settings, how to access and modify them on Shopify, and the specific types of DNS records you'll work with. From A records that direct your domain to an IP address, to CNAME records for subdomains, and MX records for email routing—each plays a vital role. We also discussed how to troubleshoot common DNS issues, like incorrect A records or multiple AAAA records.
Importance of Correct DNS Setup
Correct DNS setup is vital for:
- Website Accessibility: Ensures customers can reach your store without errors.
- Email Functionality: Proper MX records ensure your emails are delivered.
- Security: Proper CAA records prevent unauthorized SSL certificate issuance.
- Global Reach: Correct AAAA records ensure users worldwide can access your site.
Ignoring DNS issues can lead to connectivity problems, lost sales, and a poor customer experience.
First Pier
At First Pier, we specialize in eCommerce SEO and can help you navigate the complexities of DNS settings on Shopify. Our team ensures your store is set up correctly from the start, helping you avoid common pitfalls and technical issues.
By partnering with us, you get expert guidance and support, ensuring your Shopify store is always accessible, secure, and optimized for success.
If you have any questions or need assistance with your DNS settings, don't hesitate to reach out. We're here to help you every step of the way.
Setting up your DNS correctly is just one step toward a successful eCommerce business. For more tips and expert advice, subscribe to our newsletter and explore our services to unlock your store's full potential.

