


Importance of Efficient Shipping for Your Shopify Store
How to set up shipping on Shopify is a critical task that can greatly impact your e-commerce success. Efficient shipping ensures your customers receive their products on time and in good condition, leading to higher satisfaction and repeat business. Here's a quick overview of the steps involved:
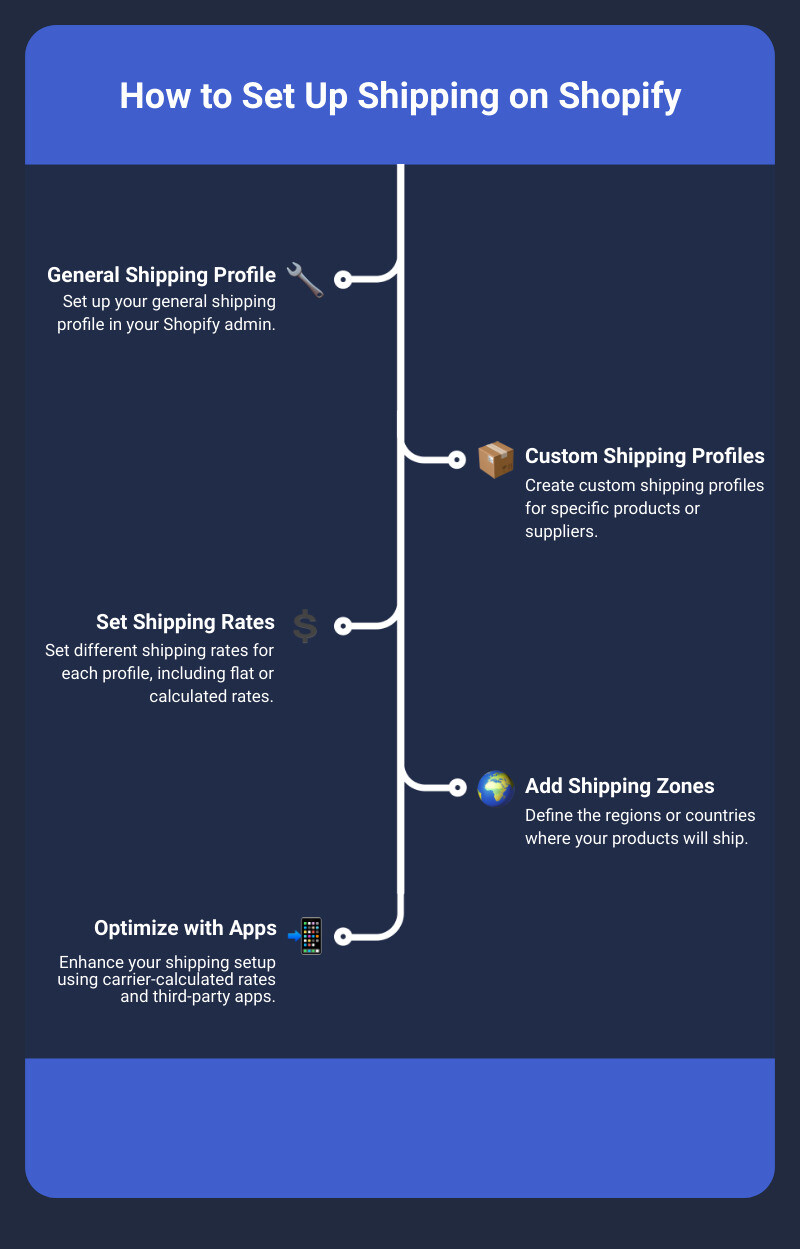
- Set up your general shipping profile in your Shopify admin.
- Create custom shipping profiles for specific products or suppliers.
- Set shipping rates for each profile, including flat or calculated rates.
- Add shipping zones to define where your products will ship.
- Optimize your setup with carrier-calculated rates and third-party apps.
Shipping isn't just about moving goods; it's about moving your business forward. Properly managing your shipping strategy can lead to reduced costs, improved delivery times, and a seamless customer experience that encourages loyalty and trust.
I'm Steve Pogson, a Shopify Expert with over two decades of experience in scaling online businesses. My expertise lies in how to set up shipping on Shopify efficiently to help brands reach their full potential.
Understanding Shopify Shipping Basics
Shipping is a crucial part of any e-commerce business, and Shopify makes it easy to manage this process. Let's break down the basics to help you get started.
Shipping Profiles
Shipping profiles allow you to set different shipping rules for different products or locations. This flexibility can save you money and keep your customers happy.
For example, if you sell both lightweight jewelry and heavy furniture, you can create separate shipping profiles. This way, the shipping rates reflect the actual cost of shipping each type of product.
To create a shipping profile:1. Go to Settings > Shipping and delivery.2. Under Custom shipping rates for products, click Create new profile.3. Name the profile and add the relevant products.4. Define your shipping origins and zones.
Shipping Zones
Shipping zones are regions where you want to ship your products. You can create zones based on countries or specific regions within countries. This helps you manage where your products can be shipped and set different rates for different areas.
To set up shipping zones:1. In your shipping profile, go to Shipping to and click Create shipping zone.2. Name the zone and select the countries or regions you want to include.3. Click Done.
Shipping Rates
Shipping rates are what your customers will pay for shipping. Shopify offers several options for setting these rates:
Flat Rates: Charge a specific amount for shipping regardless of weight or dimensions. This is simple to set up and easy for customers to understand.
Calculated Rates: These are determined by shipping carriers based on the product's weight, dimensions, and destination. This method ensures accurate shipping costs but requires more setup.
Free Shipping: Offering free shipping can boost sales and customer satisfaction. You can set conditions like a minimum order value or weight to qualify for free shipping.
To add shipping rates:1. In your shipping profile, go to the shipping zone you want to add rates to.2. Click Add rate.3. Choose between a flat rate or a carrier-calculated rate.4. Follow the prompts to complete the setup.

Real-World Example
Let's say you run an online store selling both T-shirts and ceramic mugs. You can create two shipping profiles: one for T-shirts with a flat rate and another for mugs with calculated rates. This way, your shipping costs are accurate, and your customers aren't overcharged.
By understanding these basics, you can set up a shipping strategy that fits your business needs. Next, we will dive into the specifics of creating shipping profiles, setting shipping zones, and determining shipping rates.
How to Set Up Shipping on Shopify
Creating Shipping Profiles
Shipping profiles on Shopify let you set different shipping rates for various products. This means you can charge different shipping costs based on the type of product or its supplier.
Steps to Create a Shipping Profile:
- Navigate to Settings: From your Shopify admin, go to Settings > Shipping and delivery.
- Create New Profile: In the "Custom shipping rates for products" section, click Create new profile.
- Name Your Profile: Give your profile a name. This could be based on the product type, supplier, or any other category.
- Add Products: Use the search bar to add products to your shipping profile.
- Set Shipping Rates: Define your shipping origins and zones. Click Add rate to set your shipping rates for each zone.
By setting up different profiles, you ensure that each product has an appropriate shipping rate, making your shipping costs more accurate.
Setting Shipping Zones
Shipping zones group countries or regions where you want to ship your products. Each zone can have its own shipping rates.
Steps to Add Shipping Zones:
- Navigate to Shipping Zones: In your shipping profile, go to the "Shipping to" section and click Create shipping zone.
- Name the Zone: Give your zone a name that helps you identify it easily.
- Select Countries or Regions: Choose the countries or regions you want to include in this zone. For example, you can create a zone for Europe and another for North America.
- Save the Zone: Click Done to save your new shipping zone.
Creating specific zones helps you manage shipping costs more effectively, especially if you ship internationally.
Determining Shipping Rates
Shipping rates can be flat, calculated, or free. Each type has its own benefits depending on your business model.
Flat Rates:
Flat rates charge a specific amount for shipping, regardless of the order size or weight.
Steps to Set Flat Rates:
- Add Rate: In your shipping profile, click Add rate next to the zone you want to add the rate to.
- Select Flat Rate: Choose Custom flat rate and name it.
- Enter Rate: Specify the flat rate amount, like $10 for Europe.
Calculated Rates:
Calculated rates are based on the product's weight, dimensions, and destination. Shopify integrates with carriers like USPS, FedEx, and UPS to provide these rates.
Steps to Set Calculated Rates:
- Add Rate: In your shipping profile, click Add rate next to the zone.
- Select Carrier: Choose a carrier-calculated rate.
- Configure Settings: Follow the prompts to complete the setup.
Free Shipping:
Free shipping can be a great way to attract customers. You can set conditions like a minimum order value for free shipping.
Steps to Set Free Shipping:
- Add Rate: In your shipping profile, click Add rate next to the zone.
- Select Flat Rate: Choose Custom flat rate.
- Set Rate to $0: Enter $0 as the rate and name it "Free Shipping".
- Add Conditions: Set conditions like "Free shipping on orders over $50".
By understanding how to create shipping profiles, set shipping zones, and determine shipping rates, you can create a shipping strategy that fits your business needs.
Next, we will explore advanced shipping setups, including integrating carrier-calculated rates and utilizing Shopify shipping apps.
Advanced Shipping Setup on Shopify
Integrating Carrier-Calculated Rates
Carrier-calculated rates are a game-changer for many Shopify stores. These rates are determined at checkout by third-party shipping services like USPS, FedEx, UPS, and Canada Post. This ensures your customers are charged the exact amount the carrier charges you for shipping.
Why Use Carrier-Calculated Rates?
- Accuracy: Charges reflect real-time shipping costs, reducing the risk of undercharging or overcharging.
- Transparency: Customers appreciate knowing they are paying the true cost of shipping.
- Automation: Rates are calculated automatically, saving you time.
How to Set Up Carrier-Calculated Rates:
- Go to Settings: From your Shopify admin, navigate to Settings > Shipping and delivery.
- Select Profile: Choose the shipping profile you want to edit.
- Add Carrier Rates: Click Add rate for the zone you want to configure.
- Select Carrier: Choose from available carriers (USPS, FedEx, UPS, Canada Post, Sendle).
- Enter Product Weights: Ensure all your products have accurate weights for precise calculations.
- Save Settings: Click Done and then Save.
Example: A U.S.-based store using USPS can offer customers real-time rates for First-Class, Priority Mail, or Express options, directly calculated at checkout.
Utilizing Shopify Shipping Apps
Shipping apps can further optimize your shipping strategy, especially if you deal with multiple suppliers or need advanced features.
Benefits of Shipping Apps:
- Multi-Carrier Shipping: Compare rates from different carriers to find the best option.
- Automation: Streamline order processing and label printing.
- Customization: Tailor shipping options to specific products or regions.
Popular Shipping Apps:
- ShipStation: Integrates with multiple carriers and platforms, automates shipping tasks, and provides detailed analytics.
- Boxify: Calculates dimensional weight for accurate shipping rates, ideal for oddly shaped items.
- Better Shipping: Allows for product-specific shipping rates, useful for stores with diverse products.
Setting Up Shipping Apps:
- Go to Shopify App Store: Search for the app that fits your needs.
- Install the App: Follow the installation instructions.
- Configure Settings: Set up your shipping preferences within the app.
- Integrate with Shopify: Ensure the app syncs with your Shopify store for seamless operation.
Case Study: A store using Printify for print-on-demand products can integrate the Printify app to automatically calculate shipping rates based on Printify's real-time data.
Multi-Supplier Management
Managing shipping rates for multiple suppliers can be complex. Shopify's shipping profiles and third-party apps can help streamline this process.
Tips for Multi-Supplier Management:
- Separate Profiles: Create different shipping profiles for each supplier.
- Supplier Rates: Use carrier-calculated rates if the supplier offers them.
- Shipping Apps: Utilize apps like ShipStation to manage orders from multiple suppliers.
Steps to Set Up Multi-Supplier Shipping:
- Create Shipping Profiles: Go to Settings > Shipping and delivery and click Create new profile.
- Assign Products: Add products specific to each supplier to their respective profiles.
- Set Rates: Configure shipping rates based on each supplier's policies.
- Use Apps: Integrate apps to automate and manage shipping across suppliers.
Example: A store sourcing from both Printify and AliExpress can create separate profiles and use apps like Oberlo for AliExpress and Printify's own app for streamlined shipping management.
By integrating carrier-calculated rates and utilizing shipping apps, you can create a sophisticated and efficient shipping strategy that meets your business needs and enhances customer satisfaction.
Next, we will discuss how to offer promotions and discounts on shipping to further entice your customers.
Offering Promotions and Discounts on Shipping
Promotions and discounts on shipping are powerful tools to attract and retain customers. Let's delve into how to set up shipping on Shopify with free shipping and discounted rates to boost your sales.
Free Shipping Over a Certain Value
Offering free shipping on orders over a certain value is a popular strategy. It encourages customers to add more items to their cart, increasing your average order value.
Free Shipping Criteria
- Order Value: Set a minimum order value for free shipping, like $50 or $75.
- Order Weight: Offer free shipping for orders over a certain weight.
- Specific Products: Apply free shipping to select products.
Setup Steps
- Navigate to Settings: From your Shopify admin, go to Settings > Shipping and delivery.
- Select Shipping Profile: Click the shipping profile you want to edit.
- Add Rate: Click Add rate next to the shipping zone.
- Set Rate Name: Enter the name for the rate, like "Free Shipping."
-
Set Price to $0: Ensure the Price field is
0. - Add Conditions: Click Add conditions, select Based on order price, and enter the minimum order value.
- Save: Click Done, then Save.
Discounted Shipping Rates
Discounted shipping rates can make your store more attractive without offering completely free shipping. This strategy can help you manage costs while still providing value to your customers.
Markup or Discount
- Markup: Slightly increase product prices to cover some of the shipping costs.
- Discount: Reduce the shipping fee by a certain percentage or fixed amount.
Handling Fees
Adding a small handling fee can offset some of the shipping costs while keeping the overall shipping fee low for the customer.
Setup Steps
- Navigate to Settings: From your Shopify admin, go to Settings > Shipping and delivery.
- Select Shipping Profile: Click the shipping profile you want to edit.
-
Edit Rate: Click the
...button next to the rate you want to edit and select Edit rate. - Adjust Price: Modify the Price field to reflect the discounted rate.
- Add Handling Fee: If desired, include a handling fee in the Handling fee section.
- Save: Click Done, then Save.
Marketing Strategies
Promoting your shipping discounts effectively can drive more traffic to your store.
- Highlight Offers: Display free and discounted shipping offers prominently on your homepage and product pages.
- Email Campaigns: Use email marketing to inform your customers about your shipping promotions.
- Social Media: Share your shipping discounts on social media to reach a wider audience.
By offering promotions and discounts on shipping, you can enhance your customer’s shopping experience and increase your sales.
Next, we will explore advanced shipping setups on Shopify, including integrating carrier-calculated rates and third-party apps to further optimize your shipping strategy.
Optimizing Your Shipping Strategy with First Pier
Shipping can make or break your e-commerce business. That’s why First Pier stands out as a partner in optimizing your shipping strategy on Shopify. Let's delve into how First Pier can help you streamline your shipping process and boost your business.
First Pier Expertise
First Pier is not just another e-commerce agency. With decades of experience, their team specializes in Shopify development and optimization. They understand the complexities of setting up and managing shipping, from configuring general and custom shipping profiles to integrating third-party carrier-calculated shipping.
Case Study: One of their clients, an online fashion retailer, struggled with high shipping costs and inefficient processes. First Pier implemented a custom shipping profile for high-value products and integrated third-party carrier-calculated shipping. This reduced shipping costs and improved operational efficiency.
E-commerce Optimization
A smooth and efficient shipping process is key to customer satisfaction. First Pier offers comprehensive support to ensure your Shopify store's shipping setup is both cost-effective and efficient.
- Custom Shipping Profiles: Separate products by supplier and set unique shipping rates.
- Carrier-Calculated Rates: Integrate USPS, FedEx, UPS, and more for accurate shipping costs.
- Local Delivery and Pickup: Configure these options to cater to local customers better.
Example: A gourmet food store wanted to offer local delivery and pickup. First Pier set up these features on their Shopify store, allowing them to serve their local customer base more effectively.
Why Choose First Pier?
- Expert Guidance: From setting up flat or calculated shipping rates to creating shipping zones, First Pier guides you through every step.
- Troubleshooting: They help resolve common shipping setup issues, ensuring a seamless experience for your customers.
- Enhanced Customer Experience: By optimizing your shipping strategy, you can improve customer satisfaction and drive sales.
Next, we will explore advanced shipping setups on Shopify, including integrating carrier-calculated rates and third-party apps to further optimize your shipping strategy.
Conclusion
Shipping is more than just getting products from point A to point B. It’s a crucial part of your e-commerce strategy that can affect customer satisfaction and your bottom line. Getting it right helps you build trust with your customers and encourages repeat business.
In this guide, we've walked you through the basics and advanced aspects of how to set up shipping on Shopify. From understanding shipping profiles and zones to setting up rates and utilizing carrier-calculated options, we've covered everything you need to know.
Recap
- Shipping Profiles: Customize shipping rates for different products.
- Shipping Zones: Define regions where you ship and set specific rates.
- Shipping Rates: Choose between flat rates, calculated rates, and free shipping options.
- Advanced Setups: Integrate carrier-calculated rates and use third-party apps for more flexibility.
- Promotions and Discounts: Offer free or discounted shipping to boost sales.
Importance of a Shipping Strategy
A well-thought-out shipping strategy can significantly impact your business. It not only affects your operational efficiency but also plays a critical role in customer satisfaction. Offering transparent and fair shipping rates can reduce cart abandonment and increase conversion rates.
Contact First Pier for Expert Help
Navigating the complexities of Shopify shipping can be daunting, but you don’t have to do it alone. At First Pier, we specialize in e-commerce optimization, including setting up and managing your Shopify shipping. Our team of experts can help you create a seamless, cost-effective shipping process tailored to your business needs.
Ready to optimize your shipping strategy? Contact First Pier today for expert guidance and support.
Shipping doesn’t have to be a hassle. With the right setup and expert help, you can turn it into a strength for your online store.


.png)
.png)
